
Transforming a bedroom often begins with a single statement piece, and a bespoke tufted headboard can provide that striking focal point. Crafting your own allows you to tailor every detail to suit your space, from the precise measurements that align with your bed frame to the choice of fabric that complements your interior décor. This project combines practical carpentry with creative upholstery, resulting in a piece of furniture that is both functional and visually captivating. Whether you seek a classic elegance or a modern aesthetic, the process of making a tufted headboard offers an opportunity to express personal style while ensuring the dimensions are perfectly matched to your bed.
Planning your tufted headboard: measurements and materials
Determining the Correct Dimensions for Your Bed Frame
Achieving the right headboard size is fundamental to creating a balanced and harmonious bedroom. The process begins with careful measurement of your bed frame, ensuring that the headboard extends slightly beyond the width of the mattress to create a visually pleasing effect. For a single bed, a headboard typically measures around ninety to one hundred centimetres wide, while a super king bed may require a width of up to two hundred centimetres. Beyond width, the height of the headboard plays a crucial role in the overall impact of the design. A taller headboard can add drama and presence, particularly in rooms with high ceilings, whereas a low-profile design may suit smaller spaces where a sense of openness is desired. It is essential to consider the room dimensions when planning your headboard, as an oversized piece can overwhelm a compact bedroom, while a headboard that is too modest may appear lost against a large wall. Visualising the scale by marking out the proposed dimensions on the wall with tape can help you assess the proportions before committing to construction. Custom sizes are always an option if standard measurements do not align with your bed frame, allowing for a truly bespoke furniture piece that fits seamlessly into your space.
Selecting quality materials: wood, foam, and upholstery fabric
The foundation of a sturdy and attractive tufted headboard lies in the selection of quality materials. A wooden frame forms the backbone of the structure, providing the necessary support for the layers of padding and fabric that will follow. Reclaimed materials such as old timber or repurposed doors can add character and sustainability to your project, while new plywood or MDF offers a smooth, reliable base for upholstery. The choice of wood should reflect both aesthetic preferences and practical considerations, ensuring that the frame is robust enough to withstand the weight of the foam and fabric. When it comes to foam, density is a key factor in achieving the desired level of comfort and the signature tufted effect. A high-density foam provides a firm yet soft surface that holds the tufting buttons in place without sagging over time. Medium-density foam may be suitable for those seeking a more plush feel, although it may require additional support to maintain the tufted pattern. The thickness of the foam also influences the final appearance, with thicker layers creating a more pronounced, luxurious look. Fabric selection is where personal style truly shines, as the range of options encompasses everything from budget-friendly linens to opulent materials like velvet and silk. Florals, stripes, and textured fabrics from well-known designers offer endless possibilities for customisation, allowing you to harmonise the headboard with existing décor or introduce a bold accent to the room. It is important to consider maintenance requirements when choosing fabric, as luxury materials may demand more care to preserve their beauty over time.
Constructing the Wooden Frame and Adding Padding
Building a Sturdy Wooden Structure for Support
The construction of the wooden frame is a critical step in ensuring that your tufted headboard is both durable and aesthetically pleasing. Begin by cutting the wood to the dimensions determined during the planning stage, creating a rectangular frame that matches the width and desired height of your headboard. The frame should be assembled using strong joints, such as dowels or screws, to ensure stability. For added support, consider adding horizontal or vertical cross braces within the frame, particularly if the headboard is large or if you plan to use a heavy foam layer. The edges of the wood should be sanded smooth to prevent any rough surfaces from damaging the fabric during upholstery. If you are using reclaimed wood, take the time to clean and treat the timber to remove any splinters or imperfections. The frame should be designed with the mounting method in mind, whether you intend to attach the headboard directly to the bed frame or secure it to the wall. Incorporating mounting brackets or cleats into the design at this stage will simplify the installation process later. The result should be a robust wooden structure that provides a solid foundation for the layers of foam and fabric that will transform it into a luxurious tufted headboard.
Choosing the Right Foam Density for Comfort and Tufting
Selecting the appropriate foam density is essential for achieving both comfort and the distinctive tufted appearance that defines this style of headboard. High-density foam is often the preferred choice for tufting, as it offers a firm yet pliable surface that can be indented to hold buttons securely without losing shape. This type of foam also provides a soft, comfortable effect when leaning back against the headboard, making it ideal for those who enjoy reading or watching television in bed. The thickness of the foam should be chosen based on the desired aesthetic, with thicker layers creating a more dramatic, cushioned look. Once the foam is cut to fit the wooden frame, it can be attached using a strong adhesive or upholstery staples, ensuring that it is evenly distributed across the surface. For added depth, consider layering different densities of foam, with a firmer base and a softer top layer, to achieve a balance between support and comfort. The foam should extend slightly beyond the edges of the frame to create a smooth, rounded appearance once the fabric is applied. This attention to detail in selecting and preparing the foam will ensure that the final product not only looks professional but also feels luxurious to the touch.
Upholstering and installing your bespoke tufted headboard
Creating the Tufted Effect with Fabric and Decorative Buttons
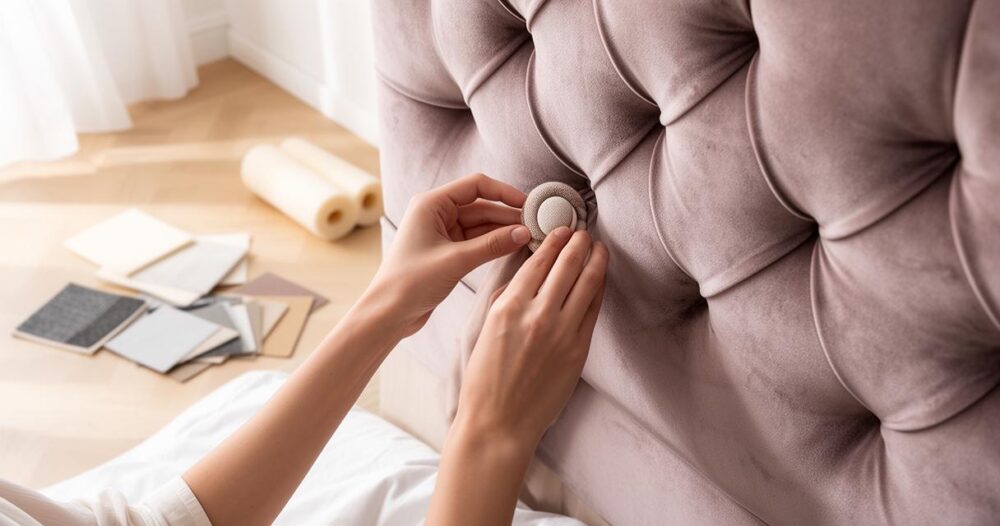
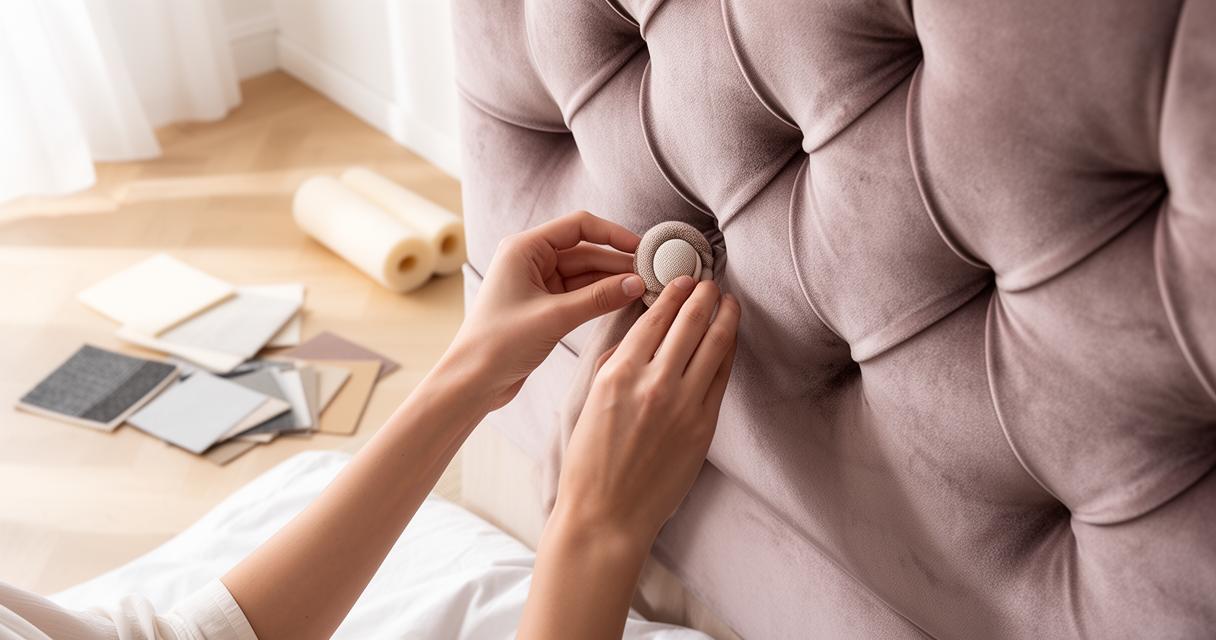
The upholstery stage is where your tufted headboard truly comes to life, as the fabric and buttons combine to create the signature quilted texture. Begin by laying the chosen fabric over the foam, ensuring that there is enough material to wrap around the edges of the frame and secure at the back. Pull the fabric taut and use a staple gun to attach it to the rear of the wooden frame, working from the centre outwards to avoid wrinkles or puckering. Once the fabric is secured, mark out the positions for the tufting buttons, spacing them evenly across the surface in a grid or diamond pattern. Using a long upholstery needle and strong thread, push the needle through the foam and wood at each marked point, looping it through the shank of a decorative button on the front and then back through the same hole. On the reverse side of the frame, secure the thread tightly to create an indentation in the foam, pulling the button snugly into the fabric. Repeat this process for each button, ensuring that the tension is consistent to achieve a uniform tufted effect. The choice of buttons can further enhance the design, with covered buttons matching the fabric for a subtle look or contrasting buttons in metallic finishes for a more striking appearance. The result is a headboard that exudes elegance and craftsmanship, with the tufted pattern adding depth and visual interest to the bedroom.
Mounting Your Headboard Securely to the Wall or Bed Frame
The final step in creating your bespoke tufted headboard is ensuring that it is securely and safely mounted. If you opt to attach the headboard to the wall, use a simple mounting system such as French cleats or heavy-duty brackets, ensuring that the fixings are anchored into wall studs for maximum stability. Measure the height at which the headboard should sit, typically aligning the lower edge with the top of the mattress or slightly above, and mark the positions for the brackets on the wall. Attach the corresponding hardware to the back of the headboard, ensuring that it is level and centred. Alternatively, if you prefer to attach the headboard directly to the bed frame, use bolts or screws to secure the wooden frame to the bed's existing mounting points, ensuring a firm connection that will not shift over time. Whichever method you choose, it is important to test the stability of the installation before considering the project complete. A securely mounted headboard not only enhances the safety of your bedroom but also ensures that your handcrafted piece remains a stunning focal point for years to come. With the headboard in place, step back and admire the transformation, knowing that you have created a piece of furniture that is perfectly tailored to your bed frame and personal style, adding a touch of bespoke luxury to your interior décor.
 How to improve your kitchen?
 How Minimalism can make Your Decoration Skills A Game Changer
 THE CANNES REMODELING EXPERT
 5 Reasons to Hire a Home Renovations Cannes Company for Your Project
 What are the factors to consider when choosing interior design company Cannes?
 Ateliers Berger and their exceptional expertise in luxury decors
 Inspiring French Country Interior Design Ideas for a Cosy Home